
By job
Stock creators
6 tools
Tools that reduce repetitive work in stock image creation, in the order you do it: remove backgrounds, trim margins, split elements, then choose keywords.
Tools
A real production sample: one flat lay through four steps
This flat lay shows five craft items on a light gray surface: brass scissors, a pink satin ribbon, a dried flower bouquet, a glass jar of buttons, and a tin candle. We processed it in this order: remove the background, crop the margins, then split the objects. These images are not available to download. Keyword Picker is omitted because it produces no image.

1. Original (1920×1280) 
2. Background removed (1920×1280) 
3. Margins cropped (1611×1207) 4. Object split: 4 files

01 Bouquet + ribbon (merged into one) 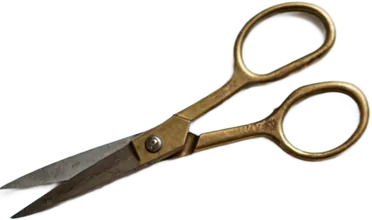
02 Scissors 
03 Button jar 
04 Candle
Step 2 preserved all five items, including the bouquet’s thin stems and the glass jar. Step 3 reduced the image from 1920×1280 to 1611×1207. In step 4, the scissors, button jar, and candle split into separate files, but the bouquet and ribbon stayed together. A faint stem in the background-removal mask appears to connect them. The default settings treat connected pixels as one object. Use crop adjustment on the result to separate the bouquet and ribbon.
How these were made: we ran step 2 (background removal) locally with the same model and processing as the live tool, so it is not pixel-for-pixel identical. Steps 3 (margin crop) and 4 (object split) use this site’s algorithms unchanged and are pixel-for-pixel identical.
What was checked at each step of this sample
Check the edges of the transparent PNG before splitting it.
Look especially at the bouquet’s thin stems and the clear parts of the glass jar. If a stem is broken or part of the glass dropped out with the background, every split file will keep that damage. In this sample, both the stems and the jar survived step 2.
After splitting, save only the files you need or download them all as a ZIP. Keep the flat lay as a set image, and use the individual items on their own too. Clean up the edges during background removal to spend less time touching up split files.
Related guides
Tell us what to build next
Tell us about repetitive tasks that take too much effort. We look at the most-supported problems first when deciding which tools to build.
Submit a problem