Upload Portal Says 'File Must Be Under 200 KB' — Compress to an Exact Target Size

Don't drag a quality slider to 70%, upload, get rejected, try 60%, upload again, and repeat until the portal finally accepts the file — and don't shrink the photo's pixels first. Set a target of 200 KB and a minimum longest side of 1,000 px, and the tool searches for the highest quality that still fits under the limit, then save the result and upload it.
Try the toolCompress Photos to a Target SizeChoose how many KB the photo should be shrunk to. The tool starts from the original size, reduces it only as needed, never lowers quality below 60%, and reports when the target cannot be met. HEIC photos can be converted to JPG.loopyti.comOne caution before you start: if the portal already rejected your file for being too large, that upload is gone — re-compress from the original photo and submit again.
How to do it in three steps
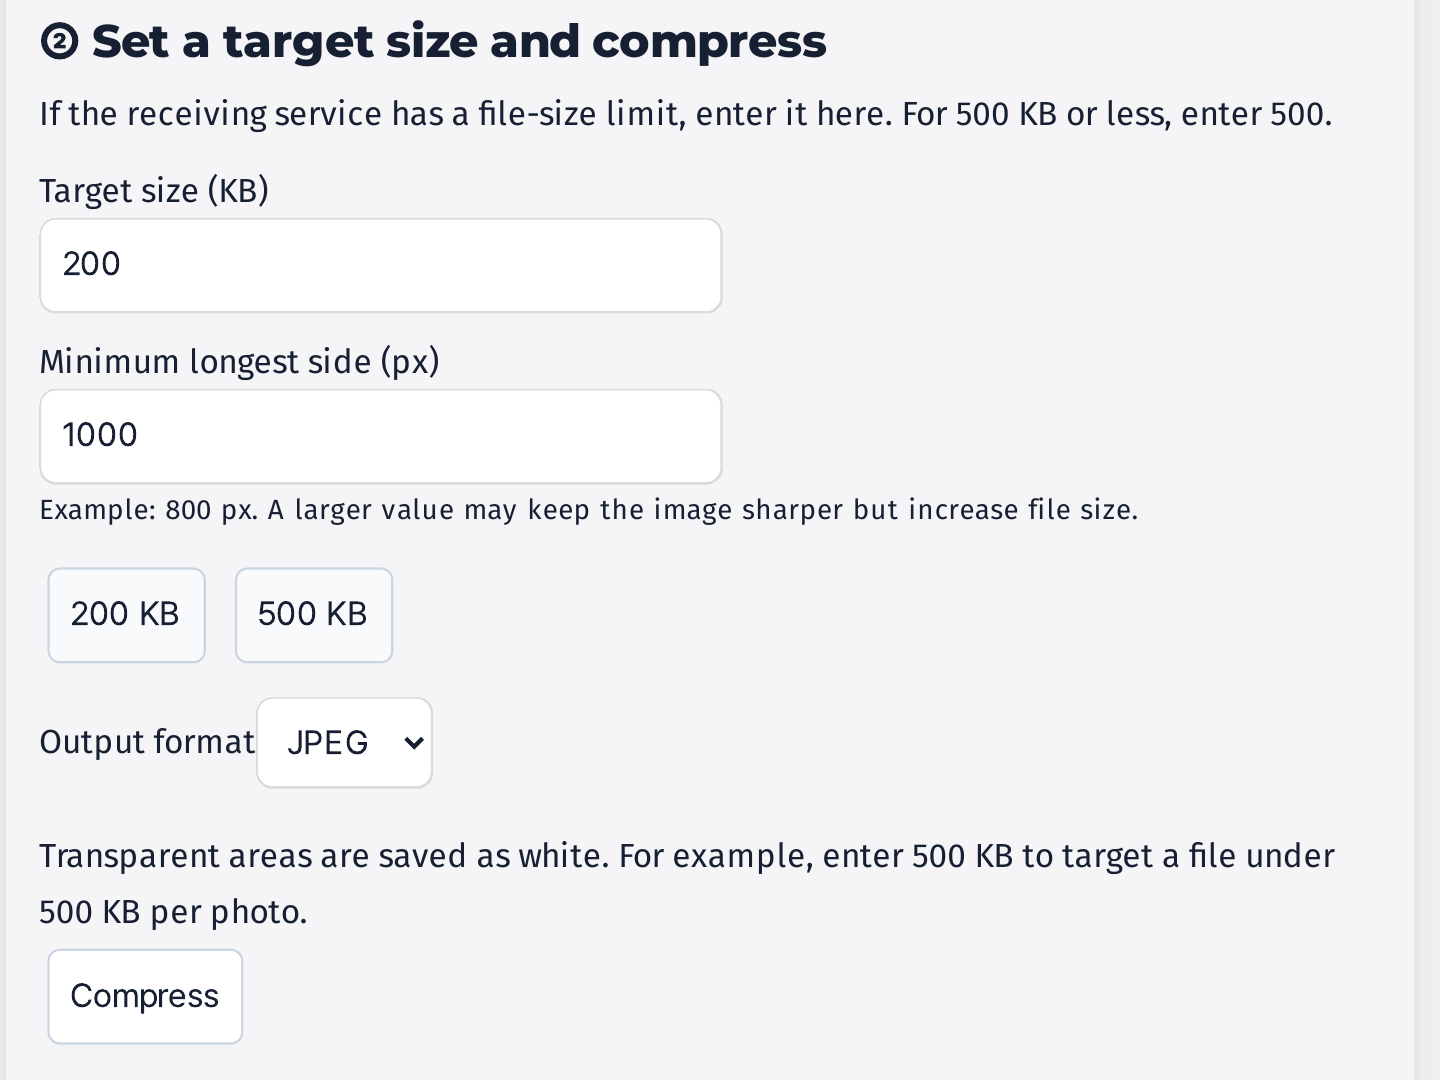
- Add the original photo and type in the target size. My test file was 4,603,668 bytes (4.39 MB) at 4032 × 3024 px — about 23 times the portal's 200 KB limit, and the portal also wanted the photo at least 600 px wide. I entered 200 as the target size in KB. (The field defaults to 200, with preset buttons for 100 KB, 200 KB, 500 KB and 1 MB.)
- Set the minimum longest side — only if the portal requires one. It lives inside step ② under "Only if the site requires a minimum size (px)"; the field defaults to 800 px, and you can leave it closed if there is no minimum. For a landscape photo the longest side is the width, so I opened it and set 1,000 px — comfortably above the portal's 600 px minimum, so the width requirement was locked in before compression started.
- Compress, save, and zoom in to check. The tool shows the original and the compressed photo side by side. Save the result, then open the downloaded file at 100% zoom and read the smallest text in it before you upload.
Does it actually work? I tested it
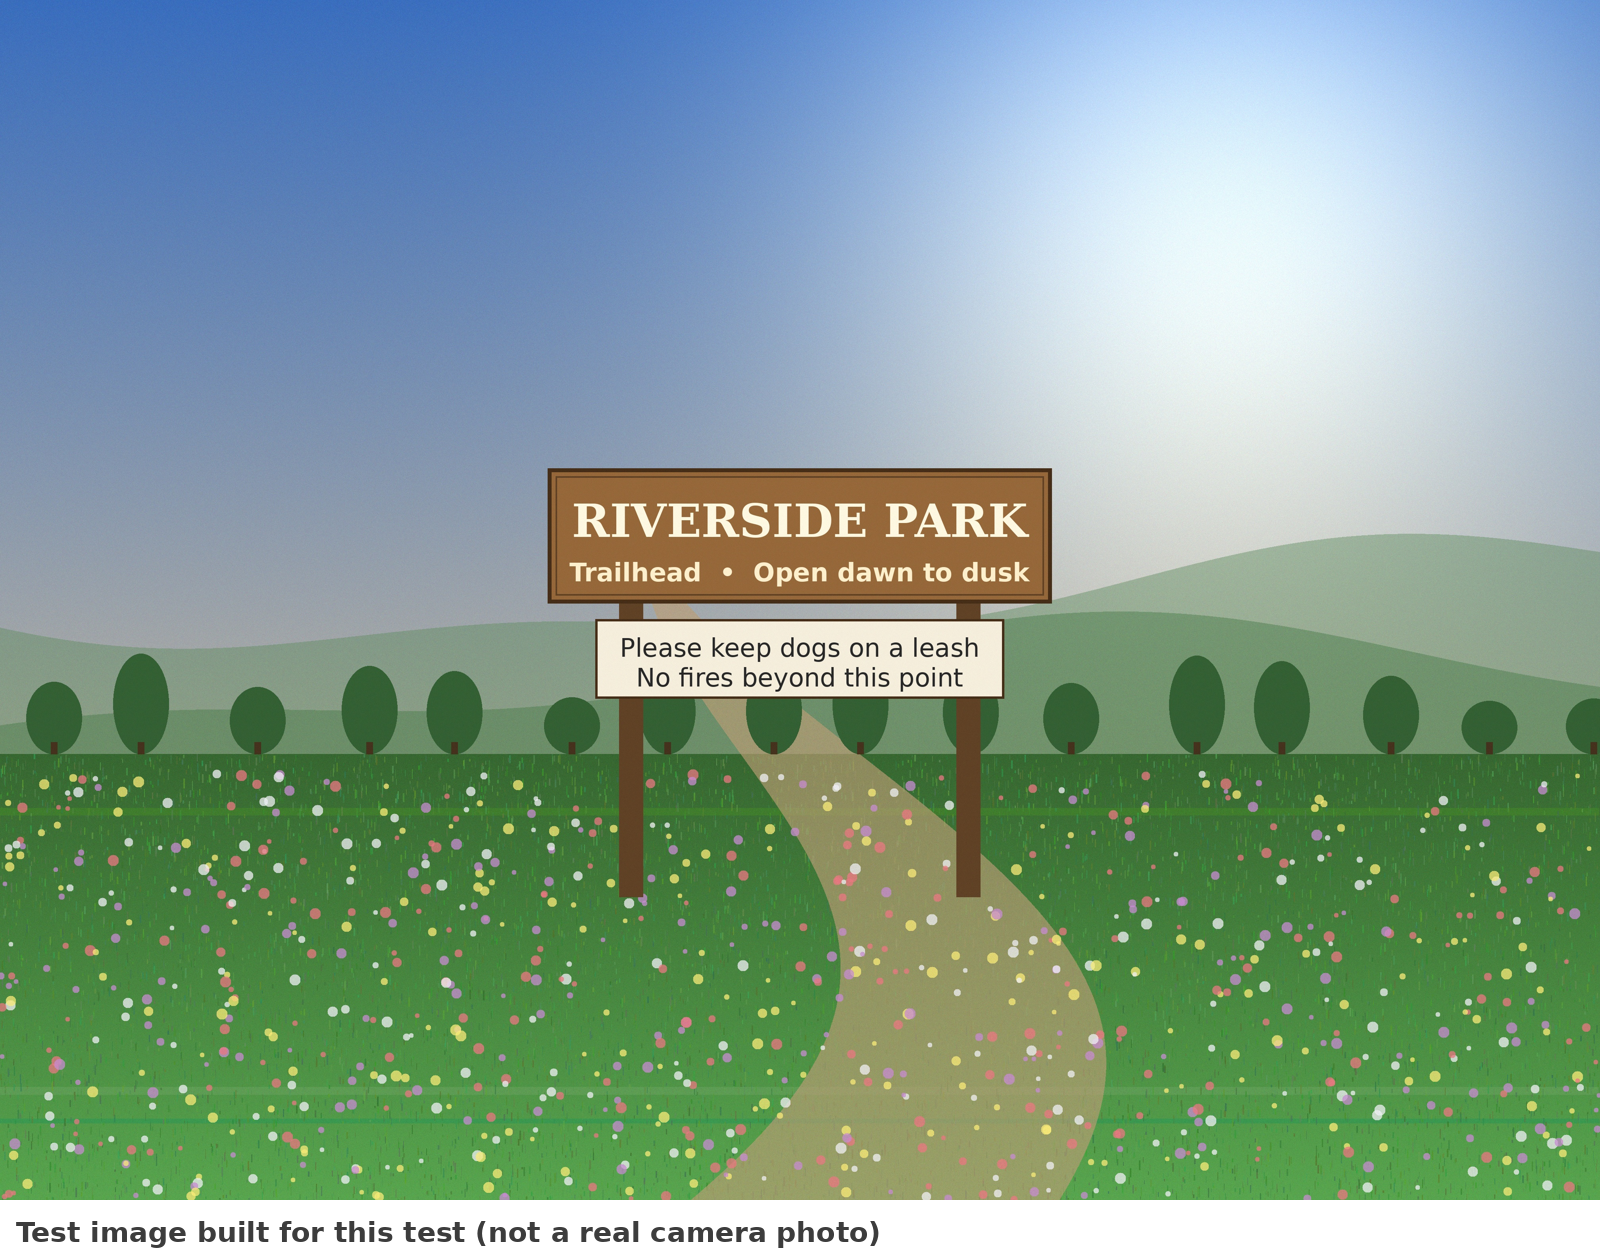
I built the test photo for this on purpose: a park scene with a wooden sign reading "RIVERSIDE PARK", "Trailhead • Open dawn to dusk", "Please keep dogs on a leash", and "No fires beyond this point". It is a built test image, not a real camera photo — but its size is real: 4,603,668 bytes (4.39 MB), 4032 × 3024 px. Tested 2026-11-12, and re-tested the same day after the tool was fixed (the first version of this post described the old behaviour — see the update note at the end of this section).
With a 200 KB target and a 1,000 px minimum longest side, the tool reported: "Original: 4.4MB → Compressed: 200KB (96% Reduced) · Photo dimensions: 2,432 × 1,824 · Quality: 60%". This time the screen and the file agree: the downloaded file measures 204,748 bytes (200.0 KiB, about 200 KB) and 2432 × 1824 px. To hit 200 KB at 60% quality, the tool shrank the photo to about 60% of its original width (4032 → 2432) as well as compressing it. So the size target was met, but the dimensions were not left alone — the file came back smaller in pixels too.
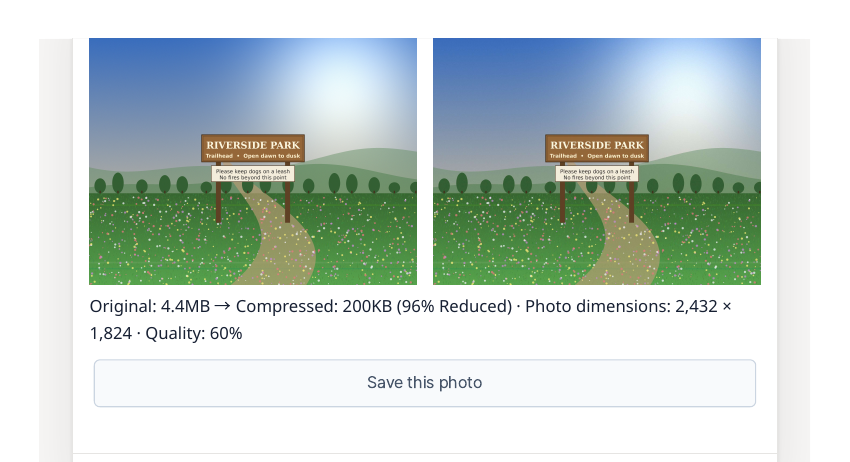
At a 100% crop of the downloaded file, all four lines on the sign are still readable. "RIVERSIDE PARK" is crisp; the three smaller lines are readable but slightly softer. There is no visible colour banding in the sky at this setting. For a portal upload, that is a pass.
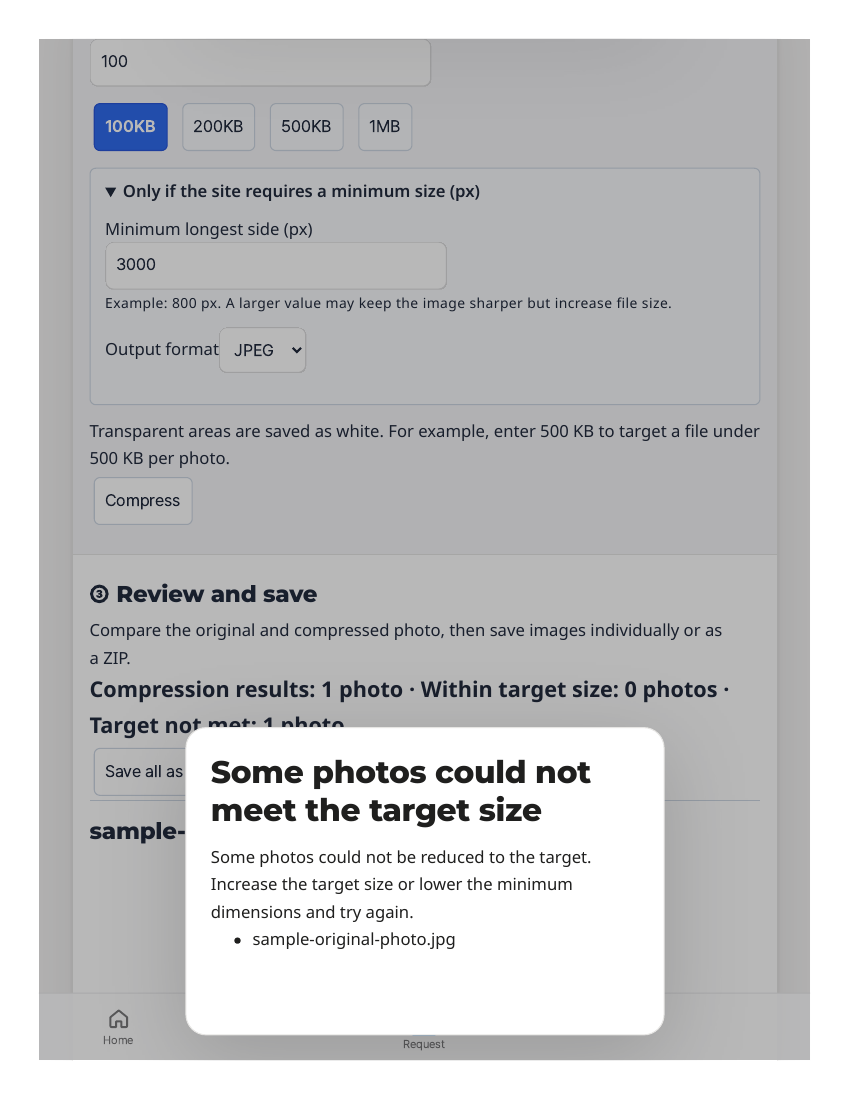
Then I tried a combination the tool should not have been able to meet: a 100 KB target with a 3,000 px minimum longest side. This time the tool refused, with a dialog titled "Some photos could not meet the target size": "Some photos could not be reduced to the target. Increase the target size or lower the minimum dimensions and try again." After dismissing it, the result reads "Compression results: 1 photo · Within target size: 0 photos · Target not met: 1 photo", and the summary says "Original: 4.4MB → Compressed: 274KB (94% Reduced) · Photo dimensions: 3,000 × 2,250 · Quality: 60%", with the notice: "Target not met: even at the lowest quality (60%) and the minimum dimensions (3,000 × 2,250), this photo is 274KB, above the 100KB target. Quality is not reduced further." The downloaded file measures 280,834 bytes (274.2 KiB, about 274 KB) at 3000 × 2250 px — the 3,000 px minimum was kept exactly, quality stayed at the 60% floor, and the tool still offers "Save this photo" for the best-effort 274 KB result. At a 100% crop the sign is still readable, and the sky shows no banding rings at this setting.
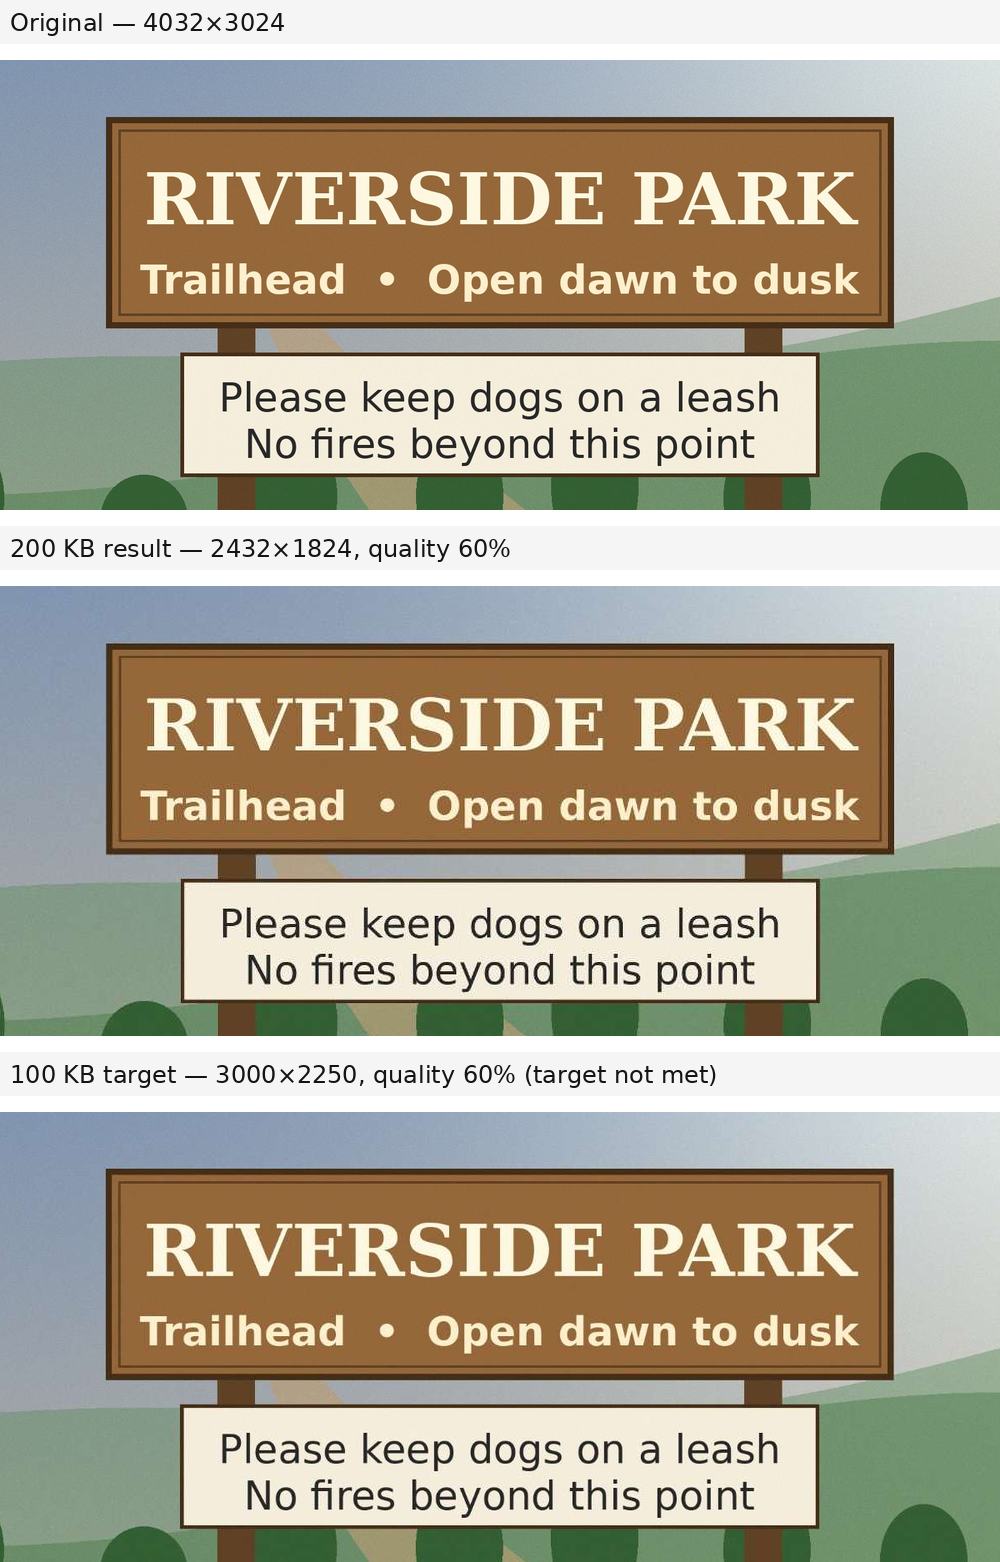
The same sign region at 100% zoom in all three files. The 200 KB result is physically smaller on screen because the file itself came back at 2432 × 1824 px, not 4032 × 3024 — that is the dimension shrink, visible here. The bottom panel is the 100 KB target's best-effort file at 60% quality (274 KB — the target wasn't met), and its sign stays readable with no banding in the sky.
Why file size and pixels are different things
A portal checks two separate numbers: how many bytes the file is, and how many pixels wide it is. Compression changes the byte count; shrinking the pixels changes the resolution. That is why the order matters: fix the width first with the minimum longest side, then let the target size decide the quality. If you shrink the pixels first, you can pass the byte limit and still fail the width rule — or throw away detail you needed.
What about the other ways?
Guessing a quality slider in a generic compressor works eventually. You pick 70%, check the size, try 60%, check again. The problem is you never know how many tries it will take to land under 200 KB, and each try is another upload to the portal. Typing the target number in once replaces the guessing.
Shrinking the pixels first drops the file size fast — a 600 px wide copy of a 4 MB photo is small. But it spends the one thing the portal also measures. If the portal wants at least 600 px and you hand it exactly 600 px, there is no margin left, and any later need for a bigger version — a print, a closer look at the text — is already lost.
The target-size approach fits the case where the portal states both numbers: a byte limit and a minimum width. You set both, and the tool finds the best quality that satisfies them.
What it won't do — read this first
- If the target can't be met, the tool says so — and still offers the best-effort file. A 100 KB target with a 3,000 px minimum now gets a dialog, a "Target not met" notice, and a 274 KB file at 60% quality. Don't mistake that saved file for a pass: it is above your target, so raise the target or lower the minimum and try again.
- The dimensions line now shows the result, not the original. After the 200 KB run the screen said "Photo dimensions: 2,432 × 1,824" and the downloaded file measured exactly that. (An earlier version of this post described the old behaviour, when the line showed the original's size.)
- At the 60% floor, detail holds up in my test. The sign stayed readable at 100% zoom and the sky showed no banding rings. Still, zoom to 100% and look at smooth gradients and small text before you submit — a different photo may not be as forgiving.
- Location and device metadata is stripped from the result. That is good for privacy, but don't expect the compressed copy to carry the original's camera or location info.
- HEIC photos convert to JPG, first frame only. If your HEIC is a Live Photo or a burst, only the first frame comes through.
- Transparent areas become white, and small photos are not enlarged. A small original stays small — there is no new detail to upscale into.
- Processing happens in your browser; the photo is never uploaded to a server. Up to 10 photos at once, 20 MB each, 60 MB total, up to 20 megapixels and 16,384 px on the longest side.
- Small rough edges: before compressing, the tool shows no original size or dimensions — you only see the file name. File sizes on screen are rounded KB only.
The one line to remember
Fix the width first, then let the target size find the quality — and if the tool says the target can't be met, believe it: raise the target or lower the minimum.
Try the toolCompress Photos to a Target SizeChoose how many KB the photo should be shrunk to. The tool starts from the original size, reduces it only as needed, never lowers quality below 60%, and reports when the target cannot be met. HEIC photos can be converted to JPG.loopyti.comFAQ
What happens if my image can't reach the target size? It tells you now. With a 100 KB target and a 3,000 px minimum, the tool showed a dialog — "Some photos could not meet the target size" — and a "Target not met" notice, stopping at 60% quality with a 274 KB best-effort file. If your target and minimum size are far apart, expect that dialog and adjust one of the two numbers.
Does compressing an image change its dimensions? It can. In my test the 200 KB run came back at 2432 × 1824 px from a 4032 × 3024 px original — the tool shrank the pixels as well as compressing, to reach the target at 60% quality. The screen's "Photo dimensions" line now shows the result's size, and the downloaded file measured exactly the same.