
Works well A fox garden illustration
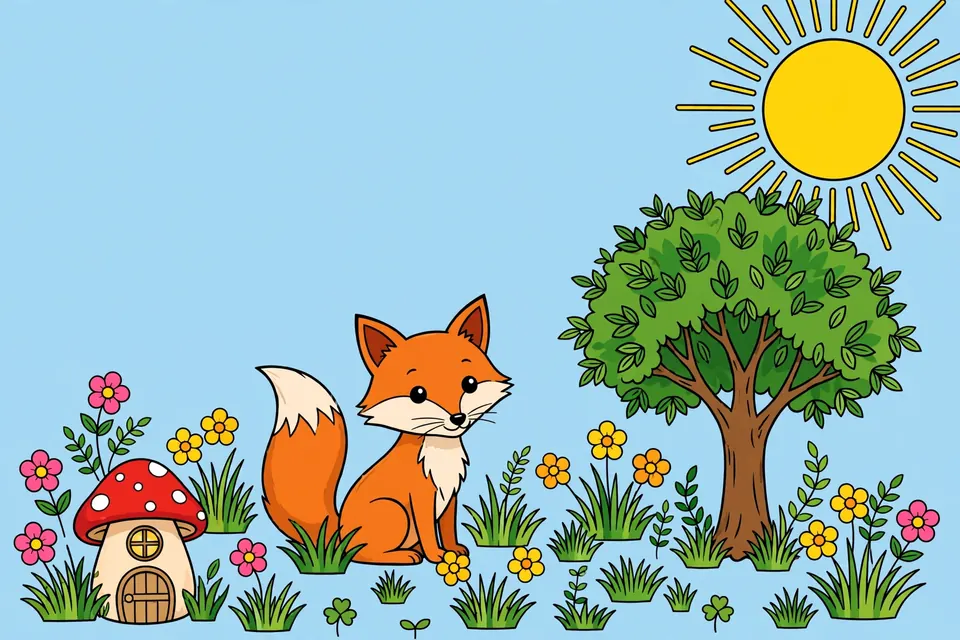
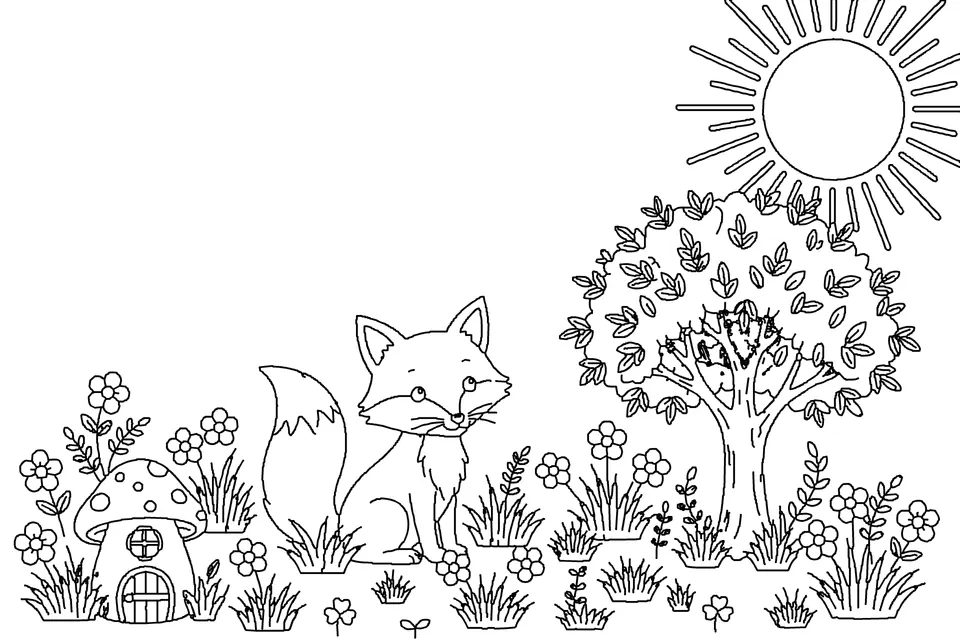
Auto mode judged it as art with existing lines. The fox, mushroom house, tree, sun and flowers all became closed outlines, and even the whiskers and eye highlights were kept as lines. The result has 47,426 lines.
Turn illustrations
into coloring pages
Images are processed only in your browser
Adjust the lines and save a PNG with a white background
Your converted coloring page appears here
Large images are saved at a maximum of 3,200 px on the longest side and 8 million pixels total. For a simpler page, lower the detail and increase line thickness.
Works best with clear illustrations on a solid background. If shading becomes lines, lower the detail or change the artwork style.
This sample shows an illustration with clear outlines and an ordinary photo, each converted with this tool. The results are PNGs on a white background.
Auto mode judged it as art with existing lines. The fox, mushroom house, tree, sun and flowers all became closed outlines, and even the whiskers and eye highlights were kept as lines. The result has 47,426 lines.
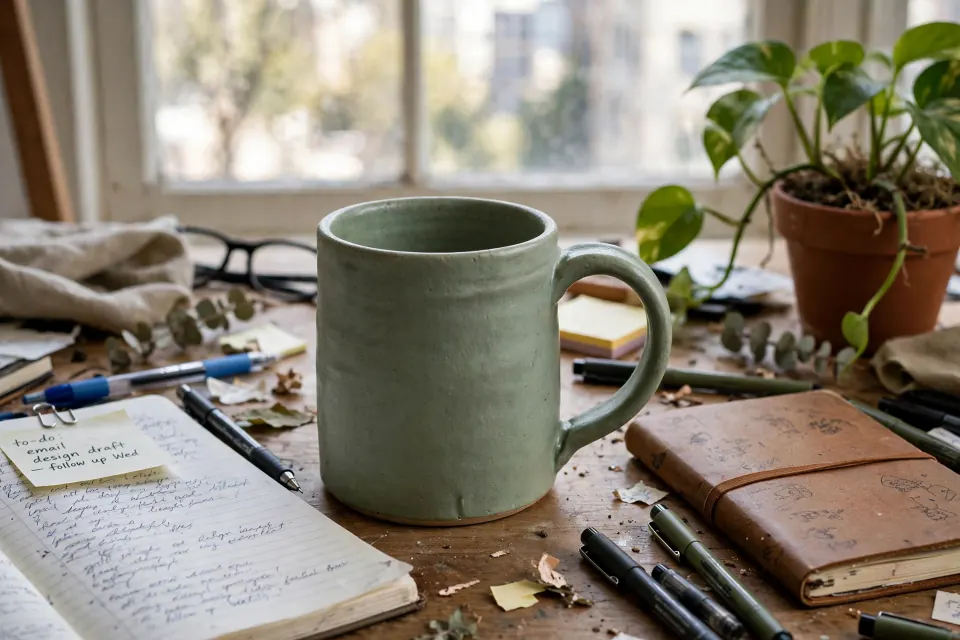
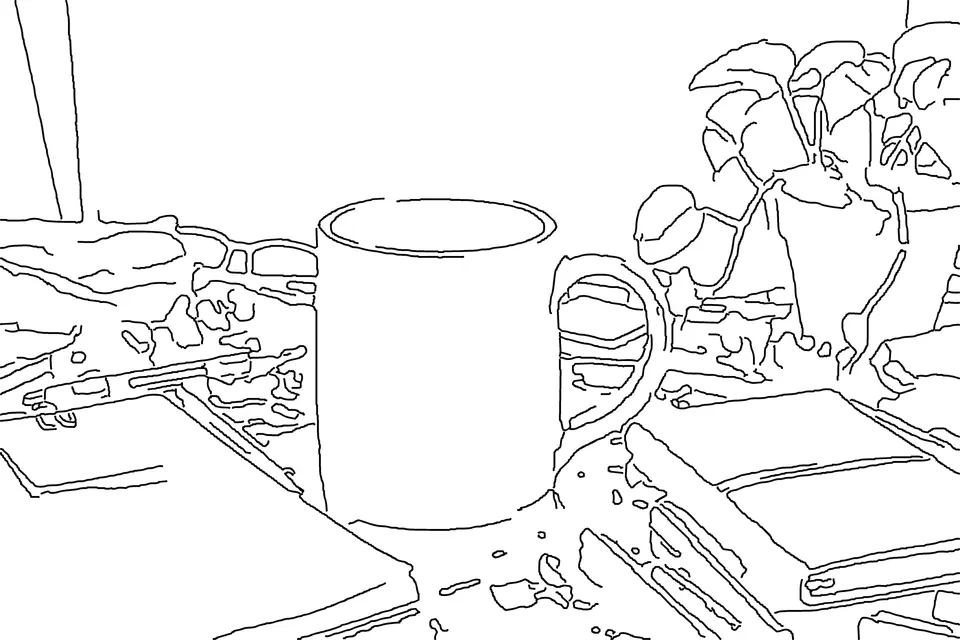
Photos need more care. Auto mode classified this image as heavily textured. It kept only the mug’s outline and lost its surface texture. Shading from the books and plant became stray lines, and the mug’s left edge is broken. Illustrations with clear outlines and flat color areas are more reliable inputs.
How this was made: The coloring engine ran with this page’s default settings: Auto style, detail 50, cleanup 50, 2-pixel line width, black, and 100% opacity.
This tool turns a color illustration into a PNG coloring page with black lines on a white background. Adjust the line width and level of detail. You can upload files up to 40 MiB and 25 million pixels. Large images are saved at a maximum of 3,200 px on the long side and 8 million pixels total.
The color areas drop out and only the black lines that carry the structure remain. The background turns white and each element becomes an empty area ready for coloring.
The point is to make a picture that was read through color readable through lines alone. Elements with strong color contrast and clear edges survive well. Where contrast is low or inner detail is dense, lines tend to break or clump.
Areas close to cream or white, like the fox’s cheeks or tail tip, differ little in brightness from their surroundings. At such borders, parts of the line can drop out or break like a dotted line. On a coloring page, one broken border can make two areas that should be colored separately look joined.
What to do: First increase the line width and convert again; weakly detected borders may connect more clearly. If a border is still missing, darken that area of the original by one shade and try again. The converter cannot fully turn a barely visible color boundary into a line.
In areas packed with small information, such as overlapping leaves or grass, keeping a lot of detail can make lines stick together into black clumps. Reducing detail too far removes inner lines such as petal divisions and leaf veins, leaving only large outlines.
What to do: Try several detail settings and compare the results instead of choosing in one pass. The right amount depends on who will color the page: fewer inner lines and larger spaces may suit young children, while adults may prefer more detail. If the original is too complex, crop the area you need and convert it separately.
Small, thin elements such as eyes, nose, mouth and whiskers tend to clump into dots or disappear after conversion. On a face, moving just a few small lines can change the expression, so zooming in matters more than looking at the whole image.
This problem is more common with photos. Their faces rely on light and shadow rather than clear outlines. The conversion may turn shadows into lines and distort facial features, or let hair shading cover the face. In the mug example above, shading from the background also became stray lines.
What to do: For stable results, use an illustration with clear shapes and outlines rather than a photo. If the face matters, adjust the line width, then zoom in to check that the eyes, nose, and mouth have not merged or disappeared. If you use a photo, start with one where the subject is large and the background and shapes are simple.
They can be converted, but photos carry more shading than flat color, so lines can get rough and details can shift. Illustrations with clear outlines and color areas are a more reliable input. If you use a photo, start with one where the subject is large and the shapes are simple.
For A4, start from the default width and check the result; for colored pencils you can try one step thicker if needed. A zoomed-in screen cannot tell you exactly how it will print. The most reliable check is to save, print once at the size you will use, and look for broken or clumped lines.
The result is a PNG on a white background. It is not a transparent PNG, so placing it on another document or image brings the white background along.
Use it to turn photos or illustrations into printable line art and adjust line color and thickness.
A colored illustration → line art retaining the outlines → a drawing with adjusted line color and thickness. Compare the original and line art in the preview.
Photos with complex shading, blurry outlines or many small details may produce broken lines or extra marks. Adjust the settings and inspect the result.
Image files are processed in your browser. Use the save buttons to download the results to your device. Attachments submitted with problem reports are handled separately on the server.
Outlines are easier to inspect when the subject stands out from its background. For blurry or heavily shaded images, adjust the settings while reviewing the output.
The tool reads the original but doesn’t change it. The result is downloaded as a separate file. Check the preview before saving.
Your browser processes the image and displays the result. Processing time depends on your device and image size.